How to Stop Condensation on a Cold Room Door?

Time:2026-09-29 Author:Ethan
0%

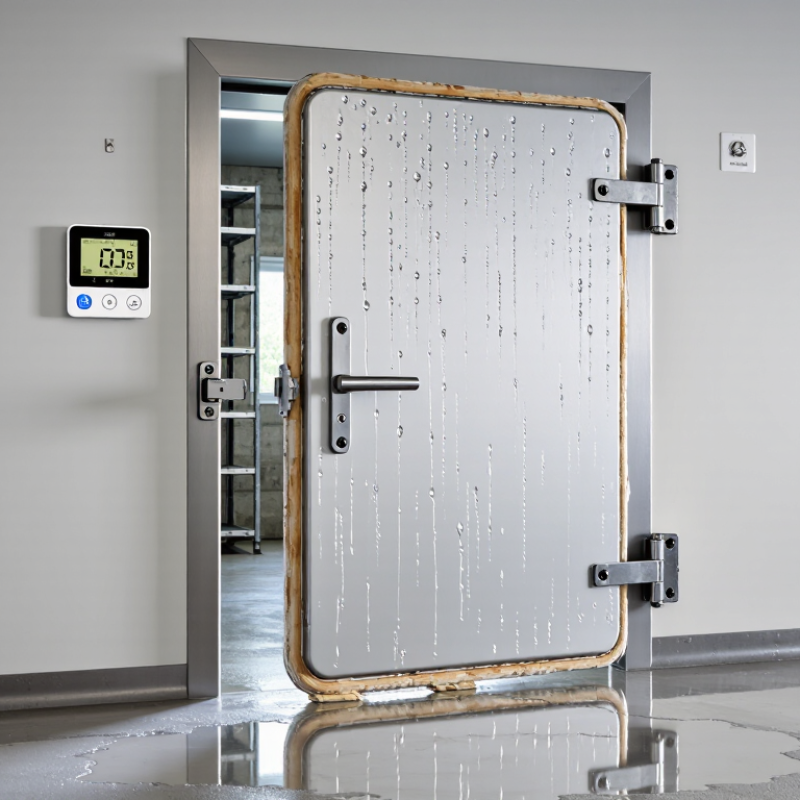
Condensation on a cold room door is more than an annoying puddle. It signals that warm, moisture-laden air is reaching a surface below its dew point. If you are asking, “Why is condensation forming on my cold room door,” start with the surrounding conditions. Check the room’s humidity, door temperature, gasket seal, and opening frequency. A warm storage area beside the door can add surprising moisture.

Joseph Lstiburek, a respected building-science expert, states, “Condensation is a function of surface temperature.” This principle explains the problem clearly. When humid air touches a cold door panel, water collects like tiny beads on a chilled glass. A damaged gasket can make the situation worse. So can a door that remains open for several minutes.

A practical inspection should include the hinge alignment, magnetic seal, door heater, and nearby drains. Use a thermometer and hygrometer, rather than relying only on appearance. Wiping the water helps temporarily. It does not fix the cause. I would not blame the refrigeration system immediately. The real issue may be uncontrolled air leakage.

This guide, How to Stop Condensation on a Cold Room Door?, focuses on measurable solutions. It explains how to reduce humidity, improve sealing, adjust operating habits, and identify mechanical faults. Some cases are simple. Others need a qualified refrigeration technician. Ignoring repeated moisture can damage insulation, flooring, stored products, and door hardware. Small details matter here. A two-millimeter gasket gap can change the entire door environment.
How to Stop Condensation on a Cold Room Door?

Identify the Causes of Condensation on a Cold Room Door

How to Stop Condensation on a Cold Room Door?

Condensation begins when warm, moist air meets a door surface below its dew point. The moisture then becomes visible water. I have seen this happen after frequent deliveries, when workers leave the door open for several minutes. A busy loading schedule can matter more than the outdoor weather.

Humidity is often the main cause. Wet floors, uncovered produce, steam, and poor ventilation add moisture to the room. Check the air near the door, not only the room’s central temperature. A hygrometer can reveal high humidity that ordinary temperature readings miss. Small leaks around the gasket also allow warm air inside. Look for flattened rubber, gaps, or frost along the frame.

Insulation problems create another common cause. Damaged panels, loose hinges, or a misaligned door can form cold spots. These thermal bridges may produce water on one section only. The door surface should feel evenly cold. It should not have one unusually icy corner.

Pressure differences can pull humid air through tiny openings. Fans, exhaust systems, and nearby open doors may create this effect. Drainage problems can also leave water near the threshold, increasing local humidity. Clean the seal, adjust the hinges, and inspect the vapor barrier carefully. Do not assume heating the door will solve everything. I once focused on surface temperature and missed a damaged seal. That mistake delayed the real repair. Check the cause before changing the equipment.

How to Stop Condensation on a Cold Room Door?

Identify the Causes of Condensation on a Cold Room Door

Condensation forms when the door surface is colder than the air’s dew point. The chart uses a typical indoor air temperature of 20°C and shows how increasing relative humidity raises the dew point. A cold room door surface at approximately 2°C can collect moisture whenever humid air reaches it. Common causes include frequent door opening, warm humid air infiltration, damaged door seals, inadequate insulation, thermal bridging around the frame, and insufficient air circulation.

Check Indoor Humidity and Improve Air Circulation

How to Stop Condensation on a Cold Room Door?

Condensation begins when warm, moist indoor air touches a colder door surface. The air cools below its dew point, leaving water droplets around the seal, handle, or lower panel. The U.S. Environmental Protection Agency recommends keeping indoor relative humidity between 30% and 50%. This range helps reduce moisture-related problems without making the room uncomfortably dry. Check humidity with a small hygrometer placed near the door, not beside a heater or humidifier.

Lower humidity during wet weather. Use an exhaust fan after bathing or cooking, and avoid drying clothes inside the room. A dehumidifier may help when readings stay above 60%. The ASHRAE Handbook—Fundamentals explains that condensation risk depends on surface temperature, dew point, and air movement. Therefore, do not focus only on the door material. Warm air must reach the cold surface evenly.

Improve circulation with a quiet fan aimed across the door, not directly at the gasket. Keep furniture, curtains, and stored boxes away from the lower vents. Leave a small air gap. In practical inspections, blocked airflow often explains moisture on one corner. A cheap hygrometer can also be inaccurate, so compare it with a second device occasionally. I would not assume every wet door needs replacement. First, check humidity, airflow, and the seal for gaps.

Inspect Door Seals, Gaps, and Thermal Bridges

How to Stop Condensation on a Cold Room Door?

Condensation usually begins at the door seal, not in the center of the panel. Inspect the gasket for flattening, splits, or hardened corners. Close the door on a thin sheet of paper. If the sheet slides out easily, the seal is probably weak. Check the frame, hinges, and latch alignment too. A clean-looking gasket can still leak.

Look for narrow gaps around the threshold and frame. Even a small opening allows warm, humid air to enter the cold room. The U.S. Department of Energy reports that air leakage can represent 25% to 40% of heating and cooling energy use in buildings. That figure is not specific to cold rooms, but it shows why minor leaks deserve attention. Remove dirt, ice, and damaged sealant before making repairs. A quick wipe is not a repair.

Thermal bridges need closer inspection. Metal fasteners, frames, and uninsulated edges can conduct heat toward the cold interior surface. Condensation forms when that surface falls below the nearby air’s dew point. ASHRAE guidance identifies surface temperature and indoor humidity as key condensation controls. Measure both with a surface thermometer and hygrometer. Do not guess. In practice, replacing a gasket may help, yet the moisture can return if the frame remains thermally connected. This is where inspections can become imperfect: the visible wet spot may not mark the actual air path. EPA ENERGY STAR states that air sealing can reduce annual heating and cooling costs by up to 20% in some homes, reinforcing the value of careful leak testing.

Apply Practical Methods to Keep the Door Surface Dry

Condensation forms when humid air meets a door surface colder than its dew point. Start with measurement, not guesswork. The U.S. Environmental Protection Agency’s Moisture Control Guidance recommends keeping indoor relative humidity below 60%, with 30–50% preferred for many occupied areas. A cold-room entrance may need lower humidity near the doorway. Use a hygrometer beside the door and compare readings during busy periods.

Keep the door surface dry with practical controls. Inspect the gasket for cracks, flattening, or food debris. Clean it with mild detergent, then check whether a sheet of paper grips evenly around the seal. Adjust the automatic closer so the door shuts fully, but does not slam. Strip curtains or a short airlock can reduce warm, wet air entering during deliveries. For freezer doors, a properly controlled heated frame may prevent frost and water formation. It must be tested carefully.

The U.S. Department of Energy identifies uncontrolled air leakage as a major source of building energy loss, making damaged seals more than a cosmetic problem. Dry the floor and frame regularly. Standing water can hide drainage or defrost faults. Wiping the glass helps briefly. It does not solve the cause. I have seen teams lower room temperature unnecessarily, which often increases surface cooling and energy use. A dew-point meter may reveal that humidity, not temperature, is the real problem. Inspect results weekly, because a door that works today may fail after repeated traffic.

How to Stop Condensation on a Cold Room Door? - Apply Practical Methods to Keep the Door Surface Dry

Practical methods for reducing moisture on a cold door surface by controlling indoor humidity, improving insulation, and maintaining air circulation.

Practical Method Recommended Action Useful Target or Reference Value Expected Effect on Condensation Maintenance Frequency Priority Important Notes
Control indoor relative humidity Use a dehumidifier or improve ventilation to reduce the amount of water vapor in the room. Keep indoor relative humidity around 40–60% when practical. Lower humidity raises the condensation threshold and reduces water formation on the door. Check humidity daily during cold or wet weather. High At 20°C room temperature, air at 60% relative humidity has a dew point of approximately 12°C.
Keep the door surface above the dew point Measure room temperature, relative humidity, and the inside door-surface temperature with suitable sensors. Maintain the door surface at least 1–2°C above the calculated dew point. Prevents the surface from reaching the temperature at which moisture begins to condense. Measure after major changes in weather, heating, or room use. High Condensation occurs when a surface temperature is at or below the surrounding air’s dew-point temperature.
Improve door insulation Inspect the insulated core, frame, and panel for thermal bridges, gaps, or damaged sections. Use continuous, undamaged insulation with no visible gaps around the panel and frame. Reduces heat loss and keeps the interior-facing door surface warmer. Inspect seasonally and whenever cold spots appear. High Condensation concentrated along one edge or corner often indicates a thermal bridge or insulation defect.
Replace or adjust door gaskets Check the seal for cracks, flattening, dirt, or poor contact; clean, adjust, or replace it when necessary. The gasket should contact the frame continuously around the entire door perimeter. Limits warm, humid air leakage into colder areas and reduces local moisture buildup. Inspect monthly in frequently used rooms. High A simple paper test can help identify weak sealing: the paper should resist being pulled out when the door is closed.
Reduce door opening time Close the door promptly and avoid leaving it partially open during loading, unloading, or cleaning. Keep openings as short as the operation safely allows. Reduces the entry of warm, moisture-laden air that can condense on cold surfaces. Review operating habits daily. High Frequent opening is especially problematic when the room contains wet products, wash-down water, or humid outdoor air.
Improve air circulation near the door Keep fans, vents, racks, and stored materials from blocking airflow across the door surface. Maintain a clear air path and avoid placing goods directly against the door. Reduces stagnant cold spots and helps distribute room heat more evenly. Check during every cleaning or stock change. Medium Do not direct strong airflow into an open refrigerated room if it increases warm, humid air infiltration.
Repair damaged door hardware Adjust hinges, latches, closers, and tracks so the door closes squarely and compresses the gasket evenly. The door should close fully without rubbing, sagging, or requiring excessive force. Improves sealing consistency and eliminates small leakage paths. Inspect quarterly or after impact damage. Medium Misalignment can create condensation only along one side, even when the gasket appears intact.
Limit indoor moisture sources Cover open water containers, dry wet floors promptly, and manage steam from cleaning or production processes. Avoid unnecessary standing water and visible steam near the door. Reduces the moisture load that can migrate toward the cold surface. Control moisture immediately when it is observed. High Water vapor from washing, cooking, wet packaging, and uncovered liquids can quickly raise local humidity.
Use a properly designed door heater when appropriate Install a correctly rated frame or gasket heater only where low surface temperatures and moisture conditions justify it. Follow the door system’s electrical and temperature specifications. Raises the perimeter temperature and helps prevent frost or condensation around the seal. Test operation before the cold season and inspect wiring routinely. Medium Heaters consume energy and should not replace humidity control, sealing, or insulation repairs.
Remove moisture safely Wipe the surface with a clean, absorbent cloth and remove standing water before it reaches the floor or gasket. Keep the panel, frame, and threshold visibly dry. Prevents water accumulation, staining, corrosion, mold growth, and slip hazards. As soon as condensation appears. Low Drying removes existing moisture but does not solve the underlying temperature, humidity, or air-leakage cause.
Use a simple monitoring record Record room temperature, relative humidity, door-surface temperature, and the location of condensation. Track readings at consistent times and compare them with visible moisture patterns. Helps identify whether humidity, insulation, sealing, or operating practices are the main cause. Daily during troubleshooting; weekly after conditions stabilize. Medium Repeated condensation at the same location provides useful evidence for targeted repairs.
Reference example: at approximately 20°C room temperature, the dew point is about 9°C at 50% relative humidity, 12°C at 60%, and 14°C at 70%. Actual results depend on door construction, airflow, surface temperature, and moisture sources.

Prevent Condensation Through Regular Maintenance and Monitoring

Condensation forms when humid room air meets a door surface colder than its dew point. The ASHRAE Handbook—Fundamentals explains this relationship, making routine temperature and humidity checks useful early warnings. The U.S. Environmental Protection Agency recommends keeping indoor relative humidity around 30–50%, and below 60%, to limit moisture problems. Those figures are a guide, not a substitute for checking conditions beside the door.

Tips: Record room humidity and door-surface temperature at the same time, especially during busy loading periods. Inspect the gasket for cracks, flattened spots, and food debris; check that hinges and closers pull the door fully shut. Wipe away water, then look for it returning at the same edge. Small leaks matter. A clean-looking seal may still leak at one worn corner.

Review readings weekly and after heavy use, and note any recurring wet spots. If condensation persists, ask a qualified refrigeration technician to check airflow, door alignment, and any frame heater fitted to the assembly. Don’t just turn the room colder; that can waste energy without correcting humid-air leakage. A simple log is helpful, though it can miss short humidity spikes between checks.

FAQS

Why does condensation appear on a cold room door?

Warm, moist air touches the colder door surface. The air cools below its dew point. Water then gathers near the seal, handle, or lower panel.

What indoor humidity level can help reduce condensation?

Keep relative humidity near 30% to 50%. Readings above 60% need attention. Use a hygrometer near the door, away from heaters and humidifiers.

Where should I place a hygrometer?

Place it beside the door at about chest height. Avoid direct sunlight, heaters, and humidifiers. A second device can reveal inaccurate readings.

How can I lower humidity during wet weather?

Run an exhaust fan after bathing or cooking. Avoid drying clothes inside the room. A dehumidifier may help when humidity remains high.

Can better air circulation reduce door condensation?

Yes, but airflow must reach the cold surface evenly. Aim a quiet fan across the door. Do not aim it directly at the gasket.

What objects can block useful airflow?

Furniture, curtains, and storage boxes can block lower vents. Leave a small air gap around the door area. One blocked corner may explain one wet spot.

Which door parts should I inspect during maintenance?

Check the gasket for cracks, flattened areas, and food debris. Inspect hinges and closers. The door should pull fully shut.

When should I contact a qualified technician?

Ask for help when condensation continues after humidity and airflow checks. The technician can inspect alignment, leakage, and fitted frame heating. Do not simply make the room colder. That may waste energy.

How can I monitor recurring condensation?

Record humidity and door-surface temperature together. Check them weekly and after heavy use. Wipe the water away, then watch the same edge. A simple log helps, but it can miss short humidity spikes.

Does every wet door need replacement?

Not necessarily. I would check humidity, airflow, and seal gaps before replacing it. A clean-looking gasket may still leak at one worn corner.

Conclusion

Condensation on a cold room door often develops when warm, moisture-filled air meets the door’s colder surface. If you are wondering, “Why is condensation forming on my cold room door,” start by checking indoor humidity and airflow. Moisture from daily activities, poor ventilation, or stagnant air can increase the risk. Improving circulation and managing humidity may help keep the surrounding air drier and reduce contact with cold surfaces.

Next, inspect the door seals and frame for wear, gaps, or areas where warm air can enter, and look for thermal bridges that make parts of the surface especially cold. Keep the door surface dry by wiping away moisture, limiting unnecessary door openings, and addressing sources of dampness. Regularly clean and check seals, monitor room humidity, and inspect the door for recurring wet spots. These practical habits can help identify problems early and reduce condensation over time.

Ethan

Ethan

Ethan is a seasoned marketing professional with a deep expertise in our company's innovative product line. With a passion for sharing knowledge and insights, he takes the lead in regularly updating our corporate blog, where he explores industry trends, product features, and effective marketing......