Replacing a garage door begins with accurate measurements, not a guess based on the old panel. The opening may look square, yet uneven floors, worn tracks, or settling walls can change the required dimensions. Knowing how to measure for a custom replacement garage door helps you order the correct size and avoid costly adjustments later.
This guide presents ten practical tips drawn from common installation checks and manufacturer requirements. You will examine the door opening, side room, headroom, backroom, and existing hardware. Use a steel tape measure, a level, and a notebook. Record width and height at several points, because openings rarely remain perfectly uniform. Small differences matter.
Measure twice.
A reliable measurement should include the finished opening, not the surrounding trim. Note obstructions such as lights, pipes, shelving, and low beams. Photographing these areas can help a supplier review unusual conditions. Still, measurements alone may not reveal structural problems. A trained garage door technician should confirm the opening before fabrication, especially when ordering an insulated, oversized, or custom-designed door.
Some homeowners measure only the visible door and overlook headroom. That mistake is easy to make. I have seen apparently suitable openings fail because the opener, torsion spring, or tracks lacked clearance. These tips encourage careful checking while recognizing an important limitation: every garage has its own construction details. When your notes conflict, pause and verify them rather than forcing a convenient number. Accuracy protects your budget, installation schedule, and long-term door performance.
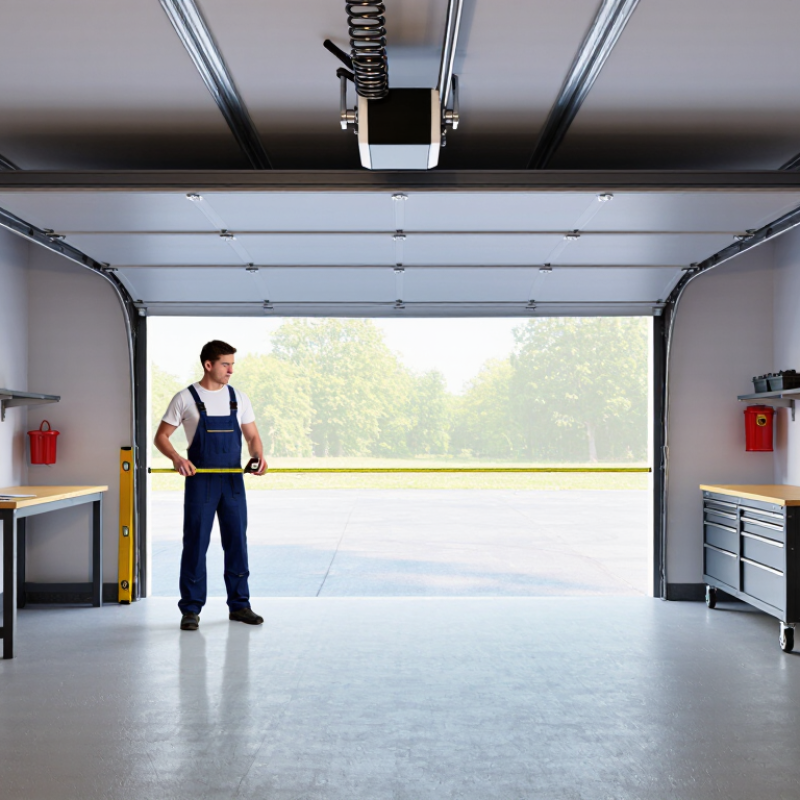
Before measuring a custom replacement garage door, identify the opening type. Is it a finished opening with visible stop molding, or a rough opening with exposed framing? This distinction affects the required door size, installation method, and final seal. ANSI/DASMA terminology helps prevent vague descriptions. Record the opening width and height, then measure both sides. Uneven dimensions may reveal settling or damaged framing.
Tip: Measure at three points for width and height. Use the smallest reliable measurement, but do not hide major differences. Note the jambs, stop molding, sill condition, and any obstructions. I have seen measurements fail because a trim board was mistaken for the true opening. That mistake is easy to make.
Tip: Document the lift configuration. Standard lift needs clear headroom above the opening. Low-headroom lift uses specialized hardware when space is limited. High-lift and vertical-lift arrangements require different track geometry. Measure headroom, sideroom, and backroom in inches. Include ceiling slopes, pipes, lights, and existing operators. ANSI/DASMA terms make these details easier to communicate with an installer. Take clear photographs, too. A tape measure cannot show every problem. Recheck the notes before ordering, especially when the floor is uneven or the opening is not square. One overlooked obstruction can change the entire installation plan.
Measuring a custom replacement garage door begins with patience, not guesswork. Use a rigid tape measure and record every dimension to the nearest 1/8 inch. Measure the opening width at the top, center, and bottom. Then measure height at the left side, center, and right side. Do not assume the opening is perfectly square.
The smallest width and height usually provide the safest planning reference, but the surrounding structure also matters. Check the floor with a level. Inspect the side jambs and header for uneven surfaces, damaged wood, or old sealant. Measure the headroom above the opening and the available space beside each track. These details can affect installation clearance. I once trusted a single center measurement and missed a slight taper near the floor. It caused unnecessary rechecking.
Tip: Write measurements immediately.
Have another person hold the tape when possible. Keep it straight, especially across wider openings. Measure twice, preferably at different times, because rushed readings can shift by 1/8 inch. Compare your notes before ordering. If the three measurements vary significantly, stop and investigate the framing instead of averaging them. A professional installer can verify unusual openings, low headroom, or walls that are not plumb. Small errors become obvious once panels, tracks, and weather seals must align.
Accurate measurements make a custom replacement garage door safer and easier to order. Use the DASMA layout approach, and record the opening width and height separately from the surrounding room dimensions. Measure the opening at several points. Floors and jambs are rarely perfect.
Sideroom is the clear space beside each side of the opening. Measure from the jamb edge to the nearest wall, pipe, cabinet, or other obstruction. Record both sides, because they may differ. Headroom is the space above the opening, measured from the top of the opening to the lowest obstruction. Check ceiling framing, ductwork, lights, and existing spring hardware. A few inches can change the suitable operating system.
Backroom is the distance from the garage door opening to the rear wall. Measure straight back along the ceiling line, not diagonally around stored items. Include the space needed for tracks, an opener, and the door’s movement. Write down every obstruction with its height and location.
Take clear photos. Label each measurement.
I once measured only the center of an opening and missed a sloping floor. That mistake forced a second visit. Measure left, center, and right, then compare the results. Do not remove springs or other loaded hardware while measuring. A qualified installer should verify the layout before fabrication, especially when the available sideroom or headroom is limited.
Top 10 Tips to Measure a Custom Replacement Garage Door
Accurate measurements begin with the existing opening, not the old door panel. Measure the width and height at three points, then record the smallest numbers. Check both jambs for plumb alignment. Small differences can affect track installation. Measure the space above the opening to the ceiling or nearest obstruction. This is the headroom.
For standard torsion hardware, use 12 inches of clear headroom as a practical benchmark. That space allows the spring shaft, drums, and horizontal tracks to fit properly. Less than 12 inches may require low-headroom hardware or a different track arrangement. Do not assume the old setup proves the space is sufficient. Previous installations can contain compromises.
Measure side room on both sides, including trim, cables, and wall-mounted equipment. Record the distance from the opening to the rear wall for the horizontal tracks. Look for lights, pipes, shelving, and ceiling braces. They often remain invisible in a quick measurement. Take photographs with a tape measure visible. It helps another technician verify your notes.
A slightly uneven floor may also change the final fit. Check the opening diagonally to identify racking. I would remeasure before ordering, even when the numbers seem obvious. That extra check feels repetitive. It is still cheaper than correcting a door that cannot balance or seal. A qualified installer should confirm the measurements before selecting springs and hardware.
Key planning dimensions for a typical residential replacement door using standard torsion hardware.
The 12-inch headroom benchmark is commonly used for standard torsion hardware. Record the opening width and height at several points, then verify side room, headroom, and backroom before ordering. The 3.75-inch side-room value and 18-inch backroom allowance are common planning benchmarks; actual requirements may vary with the door design, track arrangement, and opener configuration.
Measuring a custom replacement garage door involves more than recording the opening size. Measure the finished width and height at several points, because masonry and framing can vary. Record side room, headroom, and backroom clearance. A low beam or shifted jamb may change the required track layout. Small errors become expensive later.
Wind performance deserves careful verification. ANSI/DASMA 102 addresses sectional overhead-type doors and their wind-load performance. Do not select a door by panel appearance alone. Check the required design pressure for the property’s location, building exposure, opening size, and local construction requirements. The rating should cover the complete installed assembly, including tracks, brackets, rollers, hinges, fasteners, and reinforcement. Hardware must match the approved configuration.
Measure twice. Then question the result. A replacement opening may look square while diagonal measurements disagree. That difference can affect sealing and track alignment. Ask the installer or a qualified design professional to confirm the wind-load documentation before ordering. Keep the product drawings, anchor details, and installation instructions together. Missing hardware information is a warning sign. Never substitute ordinary fasteners for specified wind-rated anchors. Field conditions can also reveal surprises, such as concealed damage or weak framing. These issues may require structural repair before installation, and a basic tape measurement will not identify them.
| No. | Measurement Dimension | How to Measure | Example Field Data | Verification and Hardware Considerations | Record / Decision |
|---|---|---|---|---|---|
| 1 | Finished Opening Width | Measure the clear width between the finished jambs at the bottom, middle, and top. Record the smallest measurement to account for framing or finish variation. | Bottom: 16 ft 0 in Middle: 16 ft 0 1/8 in Top: 15 ft 15/16 in Selected width: 15 ft 15/16 in |
The ordered door size should be based on the verified opening, not on an old door panel. Confirm the required side and end stiles for the selected door system. | Use smallest clear width |
| 2 | Finished Opening Height | Measure from the finished floor to the underside of the header at the left, center, and right sides. Check that the floor is level. | Left: 7 ft 0 in Center: 7 ft 0 1/8 in Right: 6 ft 15/16 in Selected height: 6 ft 15/16 in |
Door height, track position, top-section clearance, and opener travel depend on the actual opening height. Do not assume the existing door size is correct. | Use smallest clear height |
| 3 | Jambs, Header, and Mounting Surface | Measure jamb depth and inspect the header and jambs for sound, continuous structural material. Check whether trim, drywall, masonry, or insulation reduces the usable mounting surface. | Left jamb: 5 1/2 in Right jamb: 5 1/2 in Header depth: 6 in Condition: solid wood framing |
Wind-load hardware transfers force into the building structure. Fasteners must be installed into suitable structural framing or engineered reinforcement, not only into trim or finish materials. | Structure acceptable after inspection |
| 4 | Sideroom | Measure the clear space from each side of the opening to the nearest wall, obstruction, pipe, cabinet, or electrical equipment. | Left sideroom: 4 1/2 in Right sideroom: 4 3/4 in Obstruction: none within track path |
Track, brackets, cable drums, and torsion hardware need model-specific clearance. Reduced sideroom may require a different lift arrangement or special hardware. | Confirm with selected hardware layout |
| 5 | Headroom and Backroom | Measure from the top of the opening to the lowest obstruction, such as ceiling joists, lights, ducts, or storage. Measure backroom from the opening toward the rear wall. | Headroom to obstruction: 15 in Backroom: 156 in Ceiling: flat, unobstructed over track zone |
Standard-lift hardware commonly requires substantial headroom, but the exact requirement depends on door height, track radius, spring system, and opener. Verify the manufacturer’s engineered layout. | Standard lift appears feasible |
| 6 | Floor Level and Opening Squareness | Check floor level across the opening and compare the two diagonal measurements from jamb corner to opposite jamb corner. | Floor variation: 3/8 in across opening Diagonal A: 193 1/4 in Diagonal B: 193 5/8 in Difference: 3/8 in |
Uneven floors and out-of-square openings can cause gaps, rubbing, premature seal wear, or uneven wind-load transfer. Correct the opening or specify suitable bottom-seal and track adjustments. | Correction recommended before installation |
| 7 | Wind Exposure and Design Pressure | Document the project location, building exposure, opening orientation, building importance, and applicable local wind criteria. Obtain the required positive and negative design pressures from the governing code or a qualified design professional. | Opening orientation: south-facing Site condition: open suburban exposure Required pressure: enter from approved calculation Example only: +30 / −30 psf |
Do not use the example pressure as a universal requirement. The door assembly, tracks, brackets, fasteners, and structural supports must be selected for the site-specific positive and negative pressures and verified under the applicable ANSI/DASMA 102 documentation. | Engineering value required |
| 8 | Door Construction and Section Details | Record the number of sections, panel height, panel thickness, glazing area, decorative hardware, and approximate door weight. Note whether the door contains windows or special inserts. | Door size: 16 ft × 7 ft Sections: 4 Panel thickness: 2 in Glazing: none Approximate weight: 280 lb |
Panel construction and glazing can change dead load, wind-load resistance, spring selection, hinge requirements, and track loads. Wind-rated performance applies to the complete door system, not just the panels. | Complete system data required |
| 9 | Track, Spring, and Cable Hardware | Identify the proposed lift type, track radius, shaft location, spring arrangement, cable path, hinge configuration, and bracket type. Do not reuse old hardware without confirming compatibility. | Lift type: standard lift Track: vertical plus horizontal Track thickness: 2 in nominal Spring system: torsion shaft Safety cables: required |
Hardware must be rated and configured for the door weight, cycle duty, dimensions, and design pressure. Wind-load reinforcement may require upgraded end stiles, brackets, track supports, fasteners, or additional structural backing. | Verify against engineered hardware schedule |
| 10 | Final Compliance and Installation Record | Before ordering, compare the measured opening, approved drawings, wind-load rating, hardware schedule, fastener pattern, labels, and installation instructions. Photograph concealed framing and record all deviations. | Opening verified: yes Wind rating documentation: pending approval Hardware schedule: pending final review Structural fastening: field confirmation required |
ANSI/DASMA 102 verification should be based on the complete documented door assembly and its installation conditions. Local building-code approval, inspection requirements, and site-specific engineering remain applicable. | Do not order until approved |
Measure the opening width and height separately from the surrounding clearances. Measure each dimension at the left, center, and right. Record the smallest result. Small errors matter.
Measure from each jamb edge to the nearest wall or obstruction. Include pipes, cabinets, trim, cables, and wall-mounted equipment. Record both sides separately. They may not match.
Headroom is the vertical space above the opening to the lowest obstruction. Check beams, lights, ducts, ceiling braces, and existing hardware. A low beam can change the track arrangement.
Twelve inches is a practical benchmark for standard torsion hardware. It may allow space for the spring shaft, drums, and horizontal tracks. Less space may require different hardware. Confirm it carefully.
Measure straight from the opening to the rear wall along the ceiling line. Do not measure diagonally around stored boxes or shelving. Include space for tracks, an opener, and door movement.
Floors and jambs are rarely perfect. Measure the left, center, and right positions, then compare them. Check both diagonals for a racked or uneven opening. I once missed a sloping floor. It caused another visit.
Write down every obstruction, including its height and exact location. Look for lights, pipes, shelving, ceiling braces, and damaged framing. Take photos with the tape measure visible. Clear labels help.
Verify the required design pressure for the property and opening. The rating should cover the complete installed assembly, not only the door panels. Check tracks, brackets, rollers, hinges, fasteners, and reinforcement. Appearance alone proves very little.
Yes. A qualified installer should review the layout before fabrication. Limited sideroom or headroom deserves extra attention. Hidden damage or weak framing may need structural repair. A tape measure cannot reveal everything.
Learning how to measure for a custom replacement garage door begins with identifying the opening type and using accurate garage-door terminology. Measure the opening’s width and height at three separate points, recording the smallest dimensions to the nearest 1/8 inch. This helps account for uneven framing and ensures the replacement door is sized correctly. Also document the sideroom, headroom, and backroom according to recognized layout standards, since these clearances affect track placement, springs, and opener compatibility.
Pay special attention to the 12-inch headroom guideline commonly used for standard torsion hardware, while recognizing that different configurations may require additional space. Finally, review the door’s wind-load rating and confirm that the supporting hardware meets the applicable ANSI/DASMA requirements for the installation area. Careful measurements and complete documentation can prevent fit problems, support safe installation planning, and help ensure the custom door operates smoothly.

Vistaro Door